© GHD
The ponytail is very easy to wear, especially when it is worn low.
1. Inflate the top of the head
To bring it a rock aspect, one creates a shell on the top of the head, to boost the volume. Some wicks are kept on the front for the finishes. The part of the top of the head is creped, which is separated by means of a comb with a tail. The hair is creped from the back so that the hair appears smooth when folded. To smooth them, brush with the side (not the hair) of a hair brush.
2. Attach to the neck
The hair is then assembled into a ponytail, trying to preserve the volume created by creping.
To boost the volume and the texture of the hair, one can also curl his hair beforehand. And pschitter a dry shampoo so that the material hangs better.
3. Camouflage the fastener
The tail of the horse is tied and the hair is loosened to the top of the head to restore volume. A wick is wrapped around the fastener to conceal the elastic.
4. A glamorous finish
With the locks left on the front, two options: leave them free or twist them and fix them at the base of the ponytail.

© Saint Algue 2014
The bohemian chignon without headband
For an easy bohemian chignon, just have a small elastic and a few hair clips.
1. Hair preparation
One begins by smoothing the hair if they are buckled and one brushes them. The preferred line is kept in the middle or on the side, with or without fringe.
2. Create a nest in the ponytail
We tie a low ponytail, then we loosen the elastic of the skull to create a kind of nest, between the attachment and the head. The idea is to wrap and pinch the lengths in the hollow created between the skull and the elastic.
3. Wrap the hair in the pit of the ponytail
To do this, one wraps to the skull and one inserts all the locks of hair, winding, as if one had an elastic headband.
4. Secure the chignon
We harmonize everything and we fix with small snow pins. On the front, one releases some locks for an even more bohemian look, and one fixes the hairstyle with a lacquer.
The bohemian chignon with a headband
If you are not familiar with the technique of winding in the ponytail inwards, have an elastic headband, place it around your skull and wrap your length around the elastic, to a retro and romantic chignon.

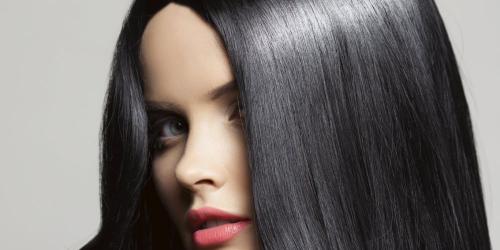
For those who have a long square and who want, for an evening, adopt the square blur glamor, we put on the undulations.
1. Looping in staggered
They are provided with a straightener, and the locks are looped by stretching them (like a roll of bolduc which is crimped with a chisel). A strand is looped in one direction, a strand in the other direction, staggered, for natural motion.
2. Loop loops
One loosens the loops to crumple a little. And lacquered for a shiny appearance.

© GHD
Tendency very present on the parades for several seasons, if we were tempted by the wet effect for an evening hairstyle? With a very fast banana bun to achieve, the wet effect will bring a modern side to our little black dress.
1. Wet hair
A gel with a wet effect, or a paste, will be applied generously. One begins by drawing a stripe on the side and brushing the hair. We take a dab of paste or gel in his hands and we apply it on our hair by placing them backwards, keeping nevertheless the movement towards the side.
2. Create Banana Chignon
A free wick is kept on the side and the rest of the lengths are wrapped in banana bun. To easily make a banana chignon, one wraps the strand of hair inwards. It can also be wound around the fingers. Fixed with bunches.
3. Secure the wick
With the remaining wick on the front, brush it with a round brush and fix it to the back. For a better hold, one generously pschitte of the lacquer. If necessary, wet gel is added.

Even on medium length hair, this braided crown is achievable. It requires a little dexterity, however.
1. Start plaiting by sticking to the skull
A crown of African braid is made, starting from the strip, with locks on the front. We take three strands and we braid by taking small strands on the sides to integrate them to the strands that are brought back towards the middle of the braid. This technique allows to stick the braid to the skull. The braid is reversed by inserting the locks downwards.
2. Braiding all around the head
One continues to plait by trying to take all the hair, to go around the skull. One takes the hair well under the ear and then in the neck ... One tries not to take too quickly the hair which are near the temple of the opposite side, in order to finish nicely the braid.
3. Finish braid with opposite temple hair
When we reach the end, we have a short length to braid in a classic way. To finish the braid, the tip is creped, the braid is loosened slightly so that it becomes thick and is fixed behind the beginning of the braided crown with flat pliers. They are lacquered for dress. This technique requires a bit of practice before you can do it alone, but the ideal is to train on a friend. If you really can not get there, there are extensions of braided hair, which will make illusion.